Sewing a coat or jacket is much more than a simple sewing project – it’s an exciting challenge that requires patience and a good dose of perseverance. This type of garment is often more complex to make than other wardrobe items, due to the many layers, detailed finishes and thicker fabrics. But it’s well worth the effort if you plan everything right from the start.
Each type of coat, whether a trench-coat, a duffle coat or a double-breasted coat, requires specific techniques and materials. By thinking through every tiny detail, you can meet your needs for warmth, comfort and style.


In this guide, we give you tips and tricks to help you sew a coat you’ll be proud of for years to come.
1. Plan every detail well
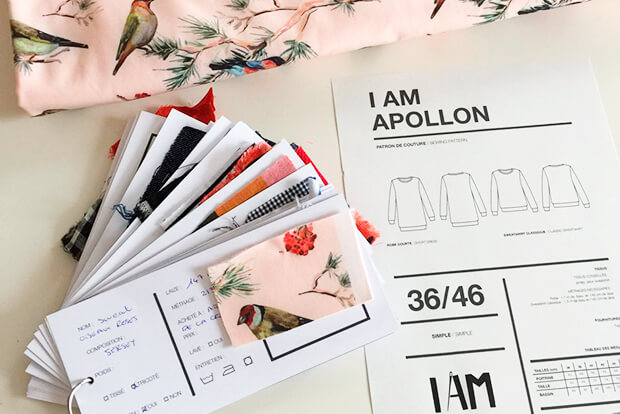
Before you set to work on your sewing machine, good planning is crucial for a successful coat. Use a sewing organiser or write everything down in a notebook so you can always refer to it later if you need to.
- Choosing the right pattern: Before you get started, take the time to analyse your needs. Your choice of pattern should be guided by your lifestyle, the type of coat you need (for example for daily use or special occasions, for winter or autumn, for rainy days or crisp cold days) and your level of sewing. To help you understand your needs and put them down on paper, you can download a free PDF document from our blog. The blog post and accompanying document will help you establish what extra pieces of clothing you actually need to add to your wardrobe. This way you can sew clothes perfectly suited to your lifestyle that you will wear all the time.
- Selecting quality fabrics: Once you’ve chosen your pattern, it’s time to choose the fabric (and lining) that will give you the look you want. Think about the final look you want for your coat: do you want a structured effect with a thick wool, a light, flowing jacket, or a waterproof fabric for a raincoat? But don’t go too far off the beaten track either: follow the recommendations for the types of fabric best suited to the pattern, as indicated in the pattern instructions. Our advice is to opt for quality fabrics, not just for durability, but also to ensure that you’ll get the result you’re after.
- Prepare the fabric before cutting: Follow the manufacturer’s care instructions and, if recommended, wash your fabric. This step is important to prevent the fabric from shrinking or deforming once the coat is finished. Be careful, though, as some woollen or technical fabrics require special treatment (dry-cleaning or hand-washing, for example). Once again, the key is to follow the manufacturer’s care instructions. Once you’ve washed your fabric, press it (see the pressing tests section below to avoid damaging your fabric) so that it’s ready for cutting.
- Choosing the right tools : Although the bare essentials are all you need to sew a coat, certain tools such as a sleeve ironing board, a tailor’s ham or a clapper can help you achieve a better result when pressing (see below for how to use them). The same applies to pins, which are recommended to be long and thin. For waterproof or technical fabrics, replace needles with clips that won’t damage your fabric. In fact, if you’re sewing a raincoat checkout our dedicated article with all our advice on how to sew raincoat fabrics.

2. Sew a muslin
- Measure carefully: Taking your measurements correctly is crucial to choosing the right size, the one that matches the cut and style of the pattern as it was designed by the designer. This ensures that the end result matches what you saw in the photo of the pattern, whether it’s a fitted or oversized coat, or one with a particular cut (Merlin’s rounded shape, for example). Choosing the right size will help you respect the original design of the pattern and achieve the look that attracted you in the first place.
- Making a toile out of calico: Sewing a toile (or muslin) allows you to check that the garment fits properly before cutting into your final fabric. The idea behind the muslin is not to make a complete garment, but simply the base of the pattern, without finishing touches (no hems or lining) to see if the pattern fits you well and if any adjustments are necessary, whether to improve the fit in relation to your body shape or for aesthetic reasons such as adjusting the length of the garment or the shape of the pockets for examples. Making a toile is even more important when working with more expensive fabrics, such as woollens or technical fabrics, to avoid wasting precious fabric and ruining your project.
- Apply adjustments to the pattern: Once you have decided on the adjustments to make , it is crucial to transfer them onto the pattern. This ensures that all the pattern pieces will be conform to the muslin, and that the adjustments are taken into account when the final fabric is cut.
3. Set your sewing machine
Before you start sewing your coat, it’s essential to test your machine settings to see how the fabric reacts to the number of layers the pattern will involve.
Use a needle suited to the fabric you have chosen and a sturdy thread. Next, you may need to adjust the stitch length and presser foot pressure depending on the thickness of the fabric. Once you’ve found the settings that will give you the best possible result, make a note of them so you can refer to them later if necessary.
Sewing coats means sewing through many layers, and to help your machine get through the layers, it’s important that the presser foot is parallel to the feed dogs. Level the foot by using a bulky seam aid or folded scraps of fabric under the presser foot in the continuity of the fabric. This allows the fabric to go smoothly under the machine and prevents the presser foot from jamming due to the difference in thickness, guaranteeing even seams.
If the coat or jacket you are sewing requires a serger, carry out the tests on the serger as well.
4. Set your iron
We can’t stress this enough: pressing seams is fundamental to ensuring a quality finish. So it’s important to do some ironing tests before you start. Every fabric reacts differently to heat and steam, so testing will help you avoid any damage later on. To do this, use fabric scraps and test different temperatures with or without steam, possibly using a wet cloth (pressing cloth) in between the iron and the fabric to avoid marking or damaging the fabric.

5. Get everything ready
- Read the instructions : Read the pattern instructions carefully before you start. This will help you understand the construction of the coat you are sewing. You’ll know all about Artemis‘ jacket pockets, Jacques’ lining construction, Rose’s collar and Bob’s back slit before you start.
- Practising new techniques : And if you come across a technique you don’t know yet, such as Bob’s welt pockets, try it out on fabric scraps. This will allow you to master it before sewing the final coat. Feel free to browse our blog for tutorials on techniques you’re not familiar with.
- Gather all your materials: Before you start sewing, gather all your sewing materials in one place. Whether it’s the sewing tools or the notions needed to make the coat, make sure you keep them all in the same place so you’re not looking everywhere for them when the time comes.
6. Press carefully
Get into the habit of pressing each seam as you sew and pressing the final garment thoroughly, taking your time. If necessary, use special ironing tools:
- Clapper: Also known as a wooden press or tailor’s press, the clapper is a particularly valuable accessory when working on structured garments such as coats or jeans, where precision and a professional finish to the seams are essential. To use the clapper, first run the iron over the seam or fold you wish to flatten, applying heat and steam (use a pressing cloth if necessary). Immediately afterwards, press the capper firmly onto the seam and hold it in place for a few seconds to allow the fabric to cool. Repeat if necessary.
- Tailor’s ham: Ideal for curved seams such as sleeve heads, shoulders or darts. The cushion moulds to the shape of the garment, allowing precise ironing without flattening or distorting the fabric.
- Sleeve ironing board: This little ironing board is designed to make it easier to iron hard-to-reach areas such as sleeves, and so avoid making unwanted creases. Alternatively, use a rolled towel that you slip into the sleeve.

7. Take your time
As you can see, making a coat requires special attention to every detail. Of course, it’s tempting to want to admire the final result before you’ve even started, but rushing into it could compromise the quality of the project. Each stage, from fabric preparation to finishing, deserves to be approached methodically and calmly. Taking your time not only avoids costly mistakes, but also allows you to fully appreciate the creative process. By going slowly, you give yourself the chance to achieve a harmonious and polished end result.
8. Two more practical tips
- Interfacing some parts: Depending on the fabric used and the model sewn, interfacing can give structure to parts such as collars and facings. Make sure to choose the right interfacing for your fabric otherwise you might end up with something too stiff or not enough.
- Add a loop: You won’t always have a coat hanger to hand, so to help preserve the shape of your coat when it’s hung up, you can simply add a discreet loop to the back neckline of the garment.

Are you ready to get started?
As you’ve likely realised by now, our guidance emphasises careful project planning and mastering techniques in advance. Investing time in these initial stages—choosing the right materials and testing methods—will enable you to sew a perfect coat.
Sewing a coat or jacket is an ambitious project that requires rigour and a personal investment, but it’s also one of the most rewarding sewing project. So, whether you’re sewing your first coat or looking to hone your skills, the satisfaction of having created such a special piece that you’ll keep for a long time is more than worth it.
Are you ready to get started?