Before diving in our first stitches of the year we always plan. Usually it’s on a list on the computer or sometimes an Excel spreadsheet. But as the year goes by, small to-do lists appear, pile up and get lost… For a while now, we’ve been thinking about how we could get better organised to be able to find all the information we need easily and rapidly. We tried to do this digitally. And very quickly the little sticky notes came back. We looked for a printable sewing planner or even one that is already printed. You can find quite a few on the Internet but none of the ones we found fit our levels of requirements and our habits of working. We have therefore designed our very own sewing planner. The best about it is that it meets all our requirements and sewing needs. We thought that if it was helping us getting all our sewing life organised, it could help you too. So we present to you the I AM ORGANISED sewing planner.

Easy to use, useful and convenient, the I AM ORGANISED sewing planner is indispensable to organise all your sewing needs all year long. Say goodbye to all those paper to-do lists, the notes on the computer or even the reminder by email… and start getting really organised.
What is a sewing planner?
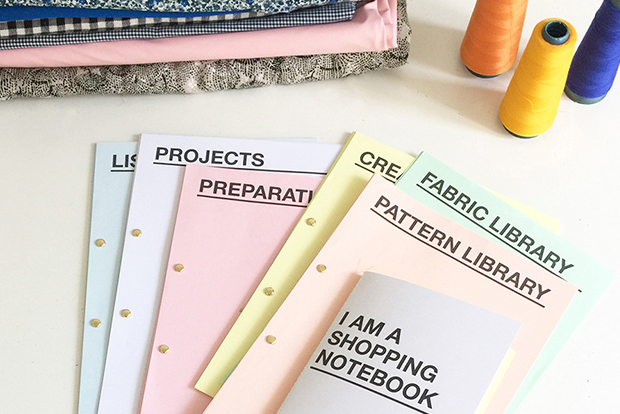
It’s a book / notebook / folder that you print depending on your needs. A few pages are proposed and you only print the ones you need. You organise your pages as you see fit.

What are the advantages?
A sewing planner helps you get organised but also gives you visibility on your ideas, your wants, your needs and helps you achieve all your sewing goals. Write down everything on paper and then tidy up to see what is actually possible. It should help you make better choices.
It also helps you complete all your sewing projects. So you can now take an idea and develop it into completion of a beautiful garment thanks to a thorough tracking of each step of the process.
How to use it?
You can use it in many many many different ways. The sky is the limit.
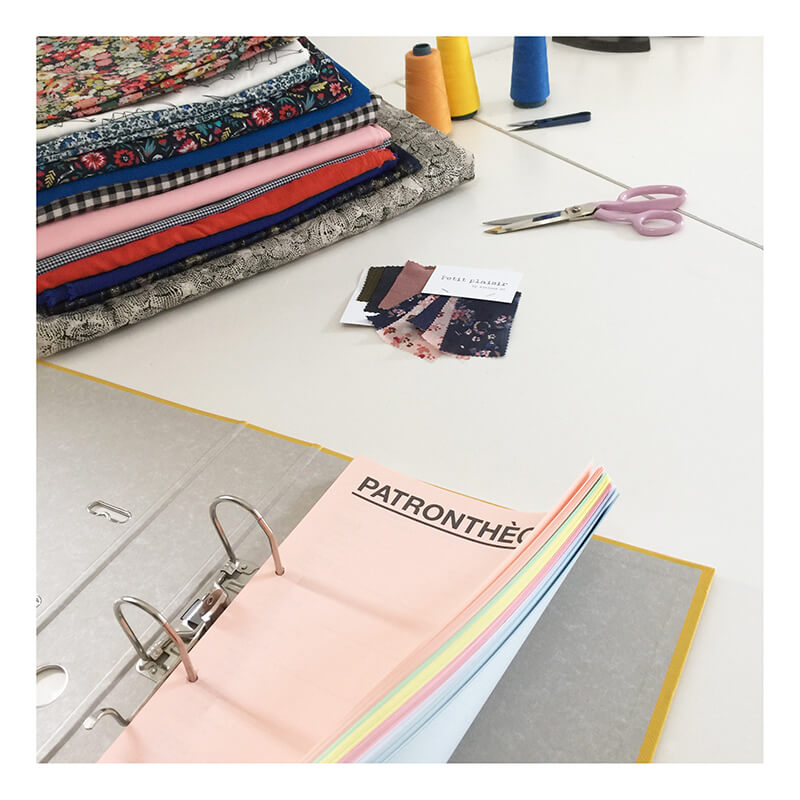
You can decide to use only certain pages on their own, or stick some on your wall, or sew yourself a notebook or even keep everything together in one folder.
To help you, below is a list of supplies we recommend for optimum use of your sewing planner.
- Either
- A folder (A4 or US Letter)
- Paper fasteners (brads)
- Recycled paper 80gsm (A4 or US letter)
- Recycled paper 250gsm (A4 or US letter) for your fabric library
- One or more rings depending on the size of your fabric library
- Tracing paper to copy technical drawings
- Photo paper to print pictures of your makes (tip: print a few pictures at a time to avoid wasting paper)
- A hole punch
- Optional:
- Dividers
- Recycled 80gms paper of different colours

How are the documents organised?
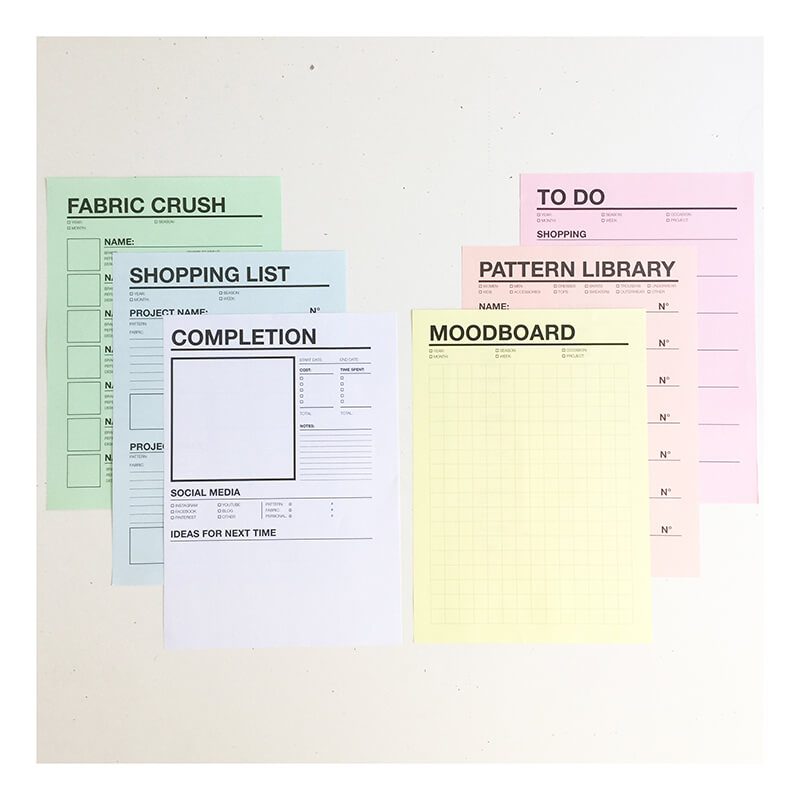
We have categorised the pages in a few different folders. You can print and gather the pages of a same category together or use them separately.
The Patterns folder
In that folder you will find the pages concerning your patterns. Whether it’s to organise your pattern library, to list the patterns you would like to possess (pattern crush) or indexing all your preferred pattern brands you’ll find them in this folder.
The Fabrics folder
This folder is similar to the pattern library one. It is always interesting and useful to have an inventory of your fabrics. But also being able to list your favourite shops and the fabrics on which you’ve fell head over heels.
We offer the possibility to organise your fabric library in 2 different ways. The first one, if you don’t own a lot of fabrics you can print the page “Fabric Library 1” and list your fabrics on a few pages and store them in a folder. The second way if you have more fabrics or if you look at them often is to create a fabric library on a ring like professionals do. Print the page titled “Fabric Library 2” and cut in 3 following the divider lines. Write all the useful information and staple a large enough piece of the fabric to your listing. Then punch a hole on the side. Pass all the pages through the ring to get an easy to look at fabric library index. This way you can even take a few out of the ring when choosing the right fabric for a project.

The Inspiration folder
This section helps you create your wardrobe by writing up your ideas, creating moodboards, and listing your needs and wants. This way, before you start a project you’ll be able to choose between all your ideas. The moodboards printed in A3 are great for keeping your ideas and inspirations on a wall of your studio. I love doing this as I get reminded of all my inspirations at any time.
The Planning folder
After having written down all your ideas it’s time to make choices and start planning your makes. This folder contains everything you need for this. From the yearly planner to the visual planning sheet, the to-do lists and the monthly calendars you have a large choice to prepare and organise yourself better.
The Project folder
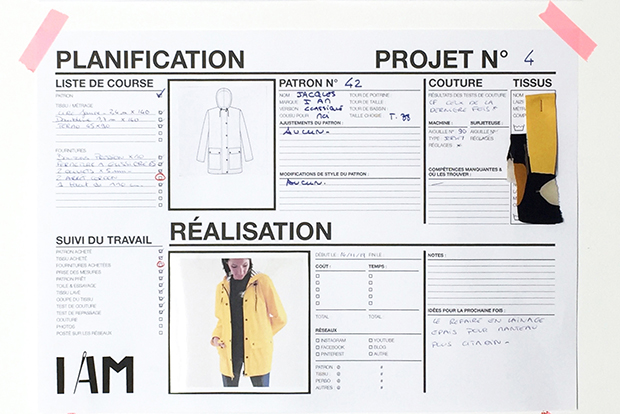
This folder includes the most important page of your sewing planner: the project page. This page (one full A3 page or 2 A4/US Letter pages) allows you to create, work on and finish a garment from A to Z with peace of mind. I love attaching each project page in A3 to the walls of my studio. This way, I always keep an eye on each on-going project. Whether it be the preparation, the sewing tests or the finishing off steps of the projects, I always know what stage I am at. I am always working on a few projects at the same time. And this for I AM Patterns or personally so this method has proven very useful to me.

The List folder
As the name gives away, in this folder you will find a few lists, each as useful as the others. You’ll be able to list the pattern hacks you have in mind, the gifts you want to make, the measurements of your entire family, track all your orders to name a few. There’s also a shopping list. I advise you to always have one to hand to be able to add items as they come to mind. This way, when the time comes to go shopping you already have everything ready. I usually start a project by buying the supplies first. But often there’s an extra item on my list like snap fasteners, thread, fusing… and this way I can buy everything at once. When I lived in Paris I would go to all the shops I needed all at once which was a real time saver. Now I order mainly on the internet and with my shopping list I can optimise the shipping cost.
The Titles folder
Finally you will find a folder with more than 60 pages to print and use as titles or dividers depending on your needs and how you want to organise your sewing planner.
The Notebooks folders
This folder allows you to print an inspiration notebook and a shopping notebook and bind the pages together by sewing them. Those are things I like to keep close to me. Regardless of where I am, as soon as I have an idea I write it down. This is why I have designed those 2 notebooks that you can print and sew. Here is another idea: print all the other pages included in the sewing planner to add them to your notebook. In order for this to be printed correctly, choose the setting: “2 copies per page” on your printer. And of course print on both sides.

Download the Sewing Planner
Are you ready to organise yourself easily and rapidly and conveniently? Download the sewing planner now and start printing the pages you need.
We wish you all a happy and organised new year
