By Atia – @thebrightblooms
A year ago, Atia (@thebrightblooms on Instagram) made a shacket using the I AM Lucienne pattern. We loved her idea so much that we asked her if she would write up a blog post to share the changes she made so you could make yours too. She kindly agreed.
If you do not know Atia yet, you’ll be so inspired following her adventures. Not only is she a talented sewist but she brings colours and kindness into our lives through her blog and her Instagram account. Knitting, interior decorations, reading, baking, Atia put a beautiful spin on everything she does.
Atia is also the host of the un:CUT podcast with Alice and Juliet. The podcast focuses on many topics dear to the makers hearts through intimate interviews and chats. They dive into how everyday people from different walks of life approach creating things they love without fear of criticism. Season 2 just ended and we’re already looking to season 3.
As you can see Atia inspires us greatly and we hope that her Lucienne shacket tutorial will inspire you too.
The sewist: Atia

« For anyone who wants to learn, I always recommend starting with simple patterns and then developing your skills slowly over time until you develop confidence. »
Follow Atia on Instagram : @thebrightblooms and discover her blog.
My name is Atia, I have been sewing for about 12 years but only started sewing clothes about 4 years ago. I enjoy sewing my own clothes as it allows me to choose clothes to suit my style and shape, and gives me a chance to be creative with fashion!
I love to use beautiful colours and patterns in my sewing and I share my projects on my Instagram and blog, The Bright Blooms. I want people to feel inspired by colour and creativity, and to feel empowered to make their own clothes.
For anyone who wants to learn, I always recommend starting with simple patterns and then developing your skills slowly over time until you develop confidence.
Tutorial
Introduction
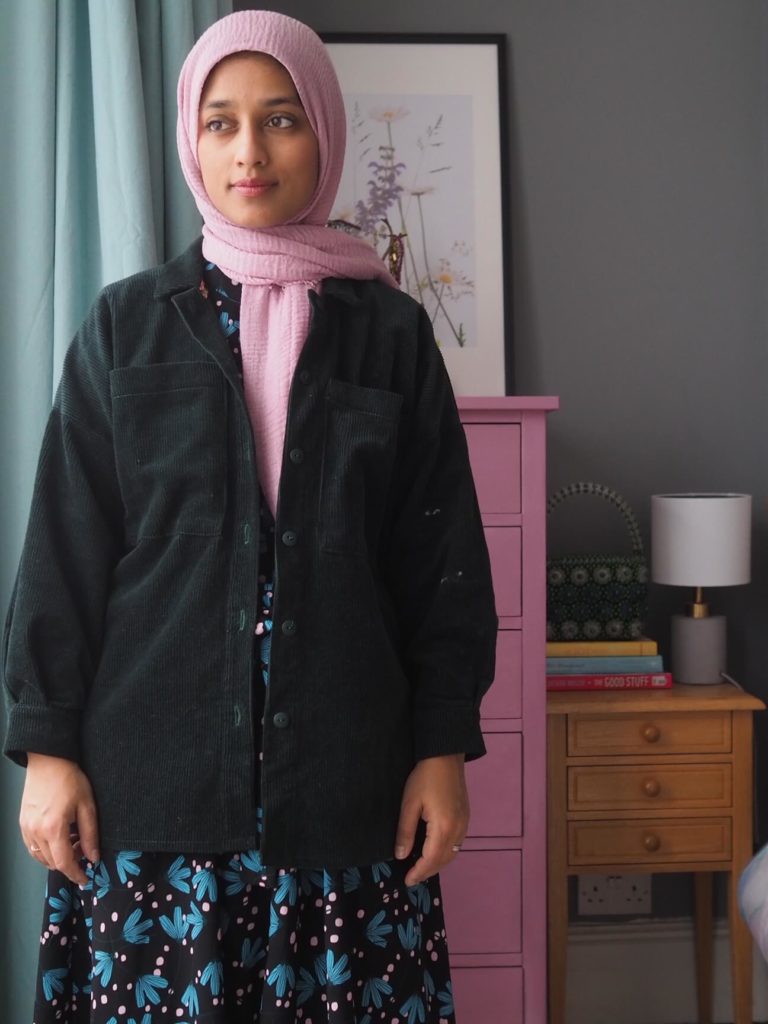
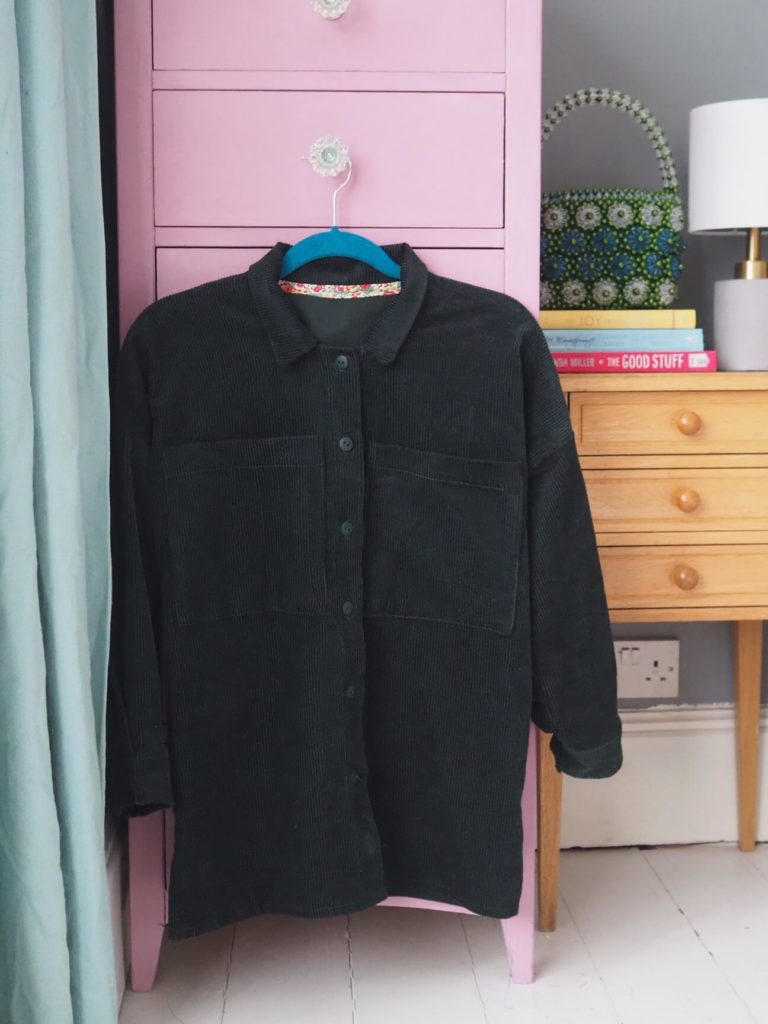
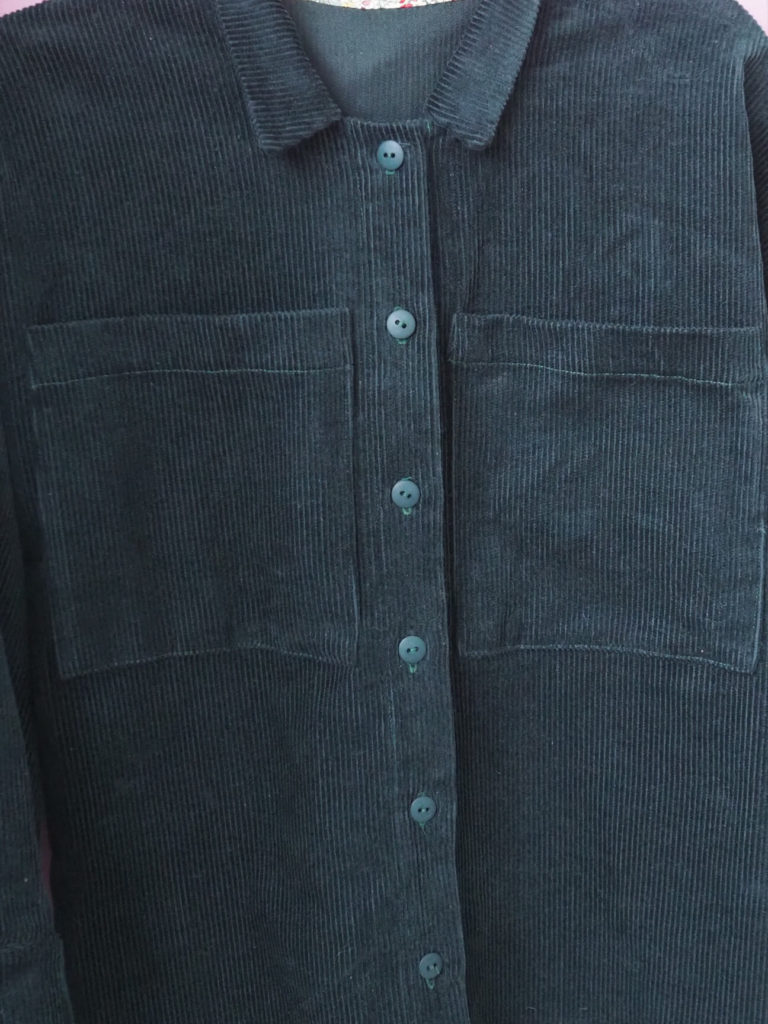
I decided to make a ‘shacket’ i.e. a jacket in the style of a shirt with large patch pockets, using the I AM Lucienne pattern. I chose this pattern because it has a loose boxy fit and simple shape. I used a chunky dark green 8 wale corduroy fabric for my jacket, which is warm and quite sturdy with a slight drape. I used 2 metres of fabric in total for my shirt, including the cuffed sleeves.
Supplies
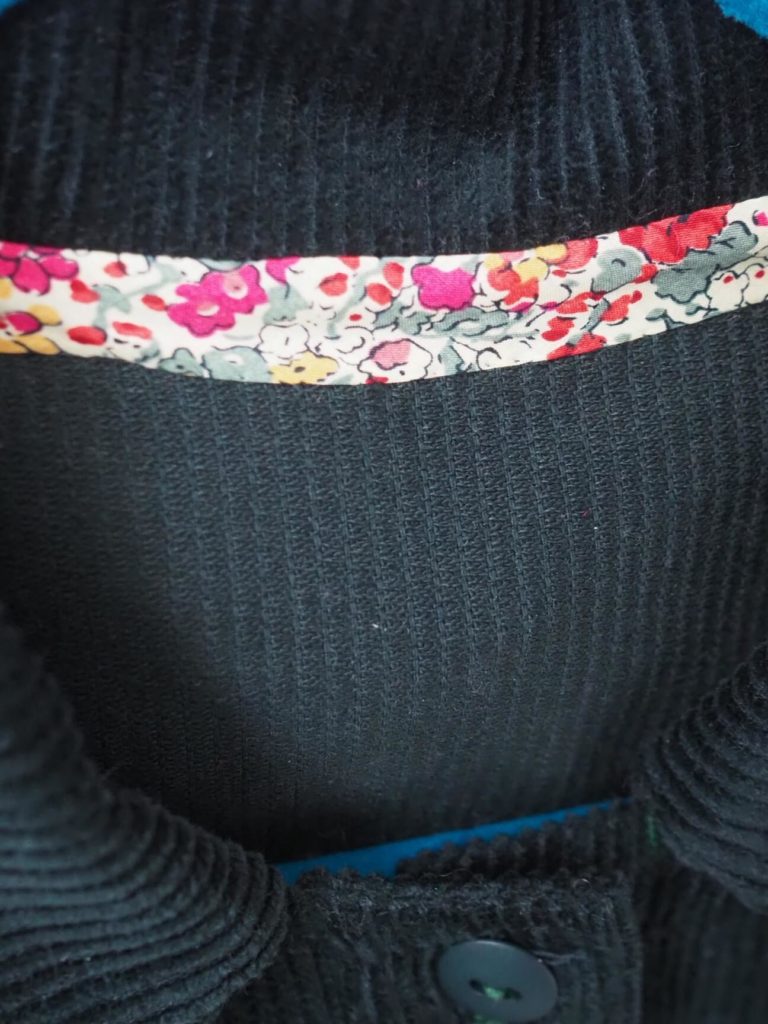
On top of the supplies listed on the instruction booklets you will need 24” (60 cm) of 3/8” (1 cm) wide bias tape to add at the collar.
To make a shacket, we advise you use corduroy, denim flannel…
You will also need the I AM Lucienne pattern as well as the classic shirt add on. If you do not have them yet, discover them now.
Preparing the pattern
The biggest change for this pattern is to alter the front and the back pattern pieces. I made it in size 38 and brought in the side seams by 2’’ (5 cm) to make the shirt narrower.
For this, on the back and the front pieces, lengthen the side seam line (green line in the drawing below). Then trace a line parallel to the side seam (red line). The spacing in between both lines is 2” (5 cm).
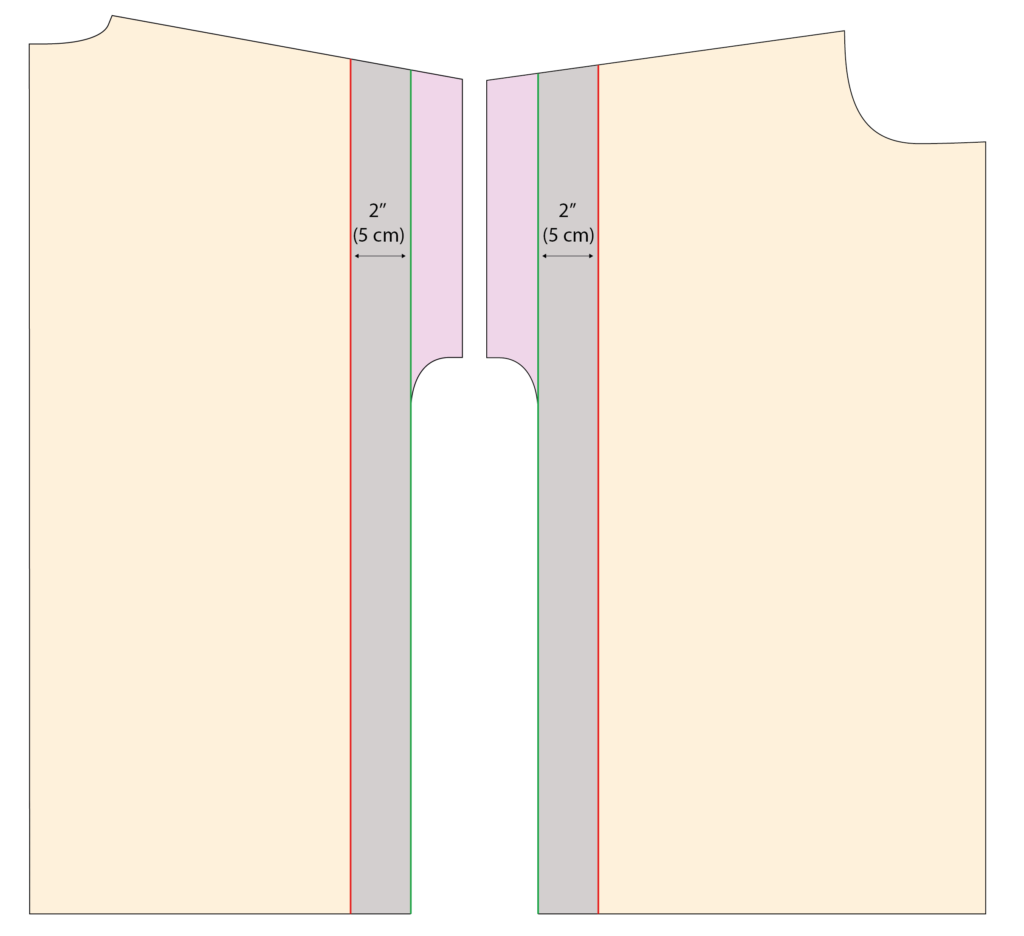
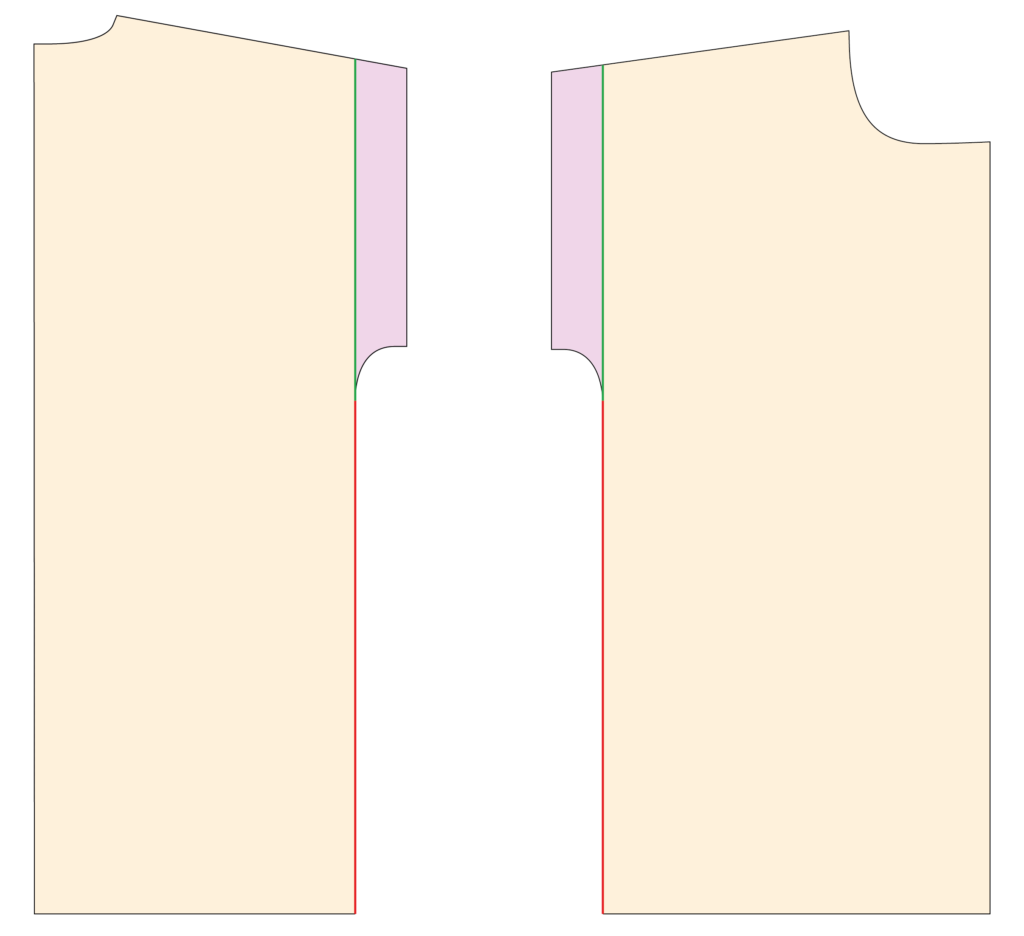
Cut along the lines and discard the grey part of the drawing. This will take the pattern 2” (5 cm) at the side seam. Align the shoulder line of the pink part in the continuity of the shoulder line of the orange part. This reassembles the front and the back pattern pieces.
Cutting the fabric
Cut the fabric following the layout plan on the instruction booklet of the sleeve add-on. I used 2 m of fabric following the layout plan and I had enough fabric to cut the patch pockets.
I cut 2 rectangles of 9 1/2” by 4” (24 cm by 20 cm) for the patched pockets.
Sewing the garment
Sew the garment following the instructions on the booklets. For the sleeve follow the instruction of the extension. Once finished you will be able to add the patch pockets on the front and the bias tape on the neckline.
Sewing the patch pockets
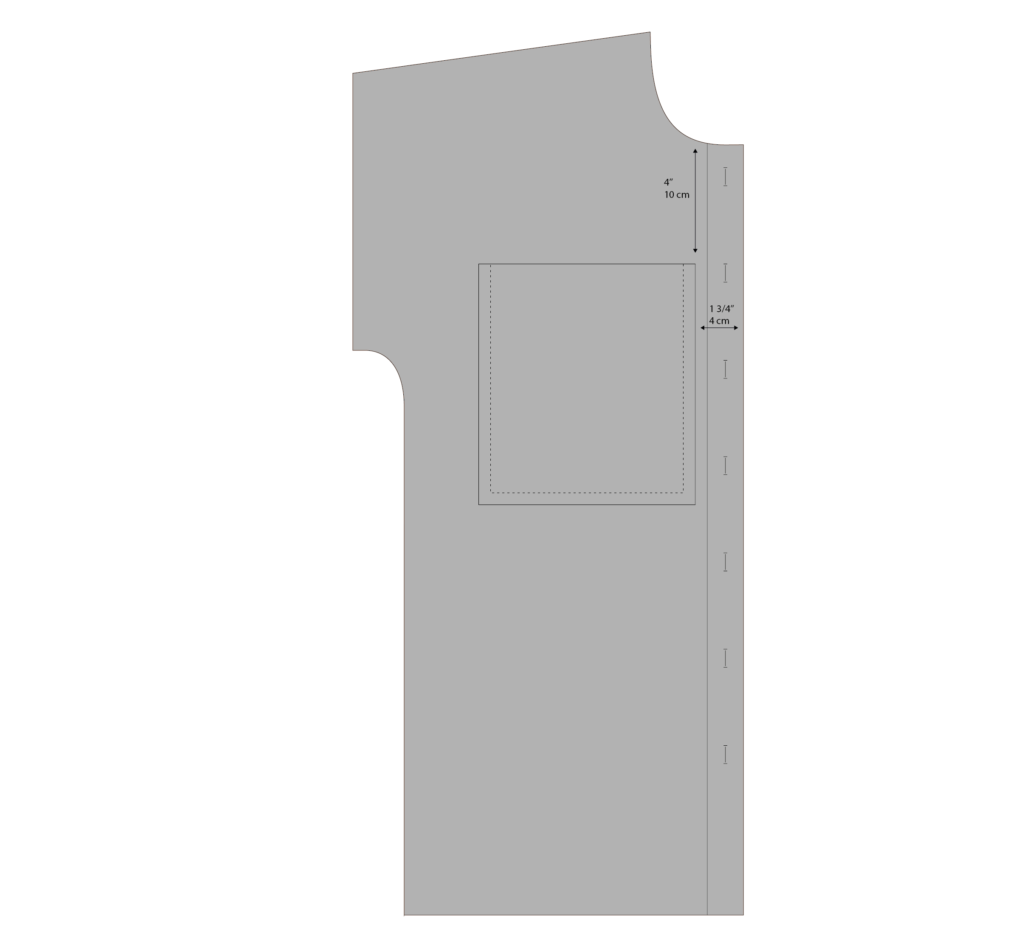
Fold and press the top edge to the wrong side by 3/8” (1 cm) then fold and press again by 1 3/16” (3 cm). Edgestitch close to the fold to form the top of the pocket. Press and fold the other 3 sides by 3/8” (1 cm) to form the pocket shape, then place on the shirt front. The top of the pocket should be 4” (10 cm) from the top of the placket and 1 3/4” (4 cm) from the shirt front edge.
Adding the bias tape
For size 38 I used approximately 43 cm of bias tape. For larger sizes you will need 60 cm at the most. First, I sewed the bias tape, right sides together with the collar piece. The bias tape is then pressed so the right side lies over the collar seam and hand stitched in place, tucking in the raw edges on both sides.
It’s done…
Your I AM Lucienne shacket is finished. Wear it with pride. Share it on social media with: @iam_patterns #iamlucienne and #iampatterns
Many thanks Atia
Many thanks to Atia for answering our questions and preparing the tutorial. If you do not follow Atia yet, we invite you to do so right now: