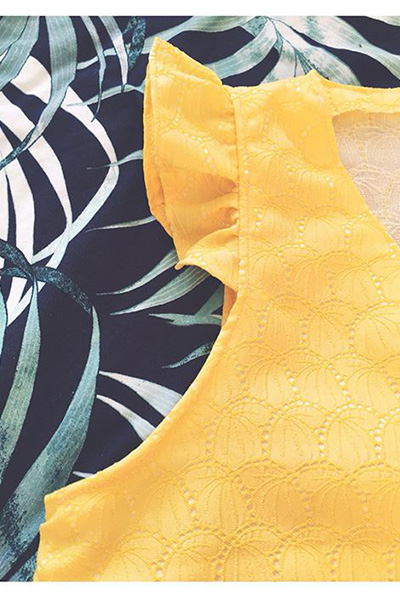
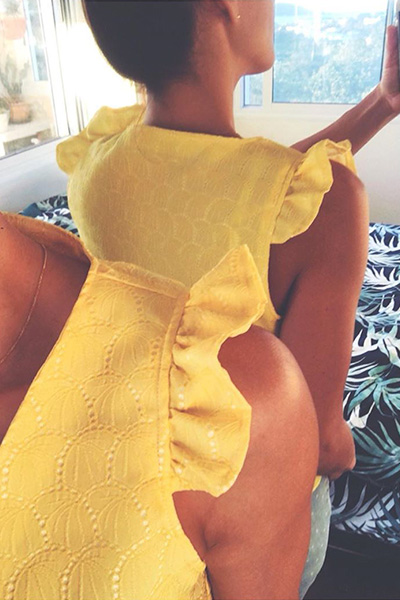
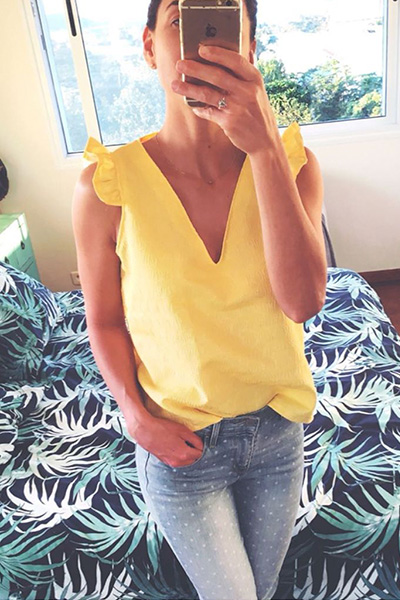
I AM Gaïa is that little cami top that goes with everything. The ribbon gathering the shoulders gives it a modern and elegant touch. Have you wondered what it would look like without the ribbon? Emilie from @fil_a_peau had the good idea of adding ruffled cap sleeves instead and it looks great. So as promised, here is the tutorial to know how to sew the ruffled cap sleeves to your I AM Gaïa top.

The seamstress: Emilie

« Whilst sewing my third Gaïa top I had a spark of inspiration, which lead me to add ruffles at the shoulders. To my delight, it was a conclusive test! »
I am Emilie, I am 34 and I have moved to New Caledonia 8 years ago.
After 9 years of being a nurse, I joined the surgical team a year ago. I wanted to sew my own scrub hats. I took one sewing lesson. I was hooked. I created an Instagram profile “@fil_a_peau” to share my makes and meet the passionate sewing community.
I sew and/or print and prepare the patterns of my future makes almost all my days off. It’s become a passion and won’t be able to stop. It relaxes me. I am in my own bubble world.
I sew and/or print and prepare the patterns of my future makes almost all my days off. It’s become a passion and won’t be able to stop. It relaxes me. I am in my own bubble world.
The I AM Gaïa cami top is one of my first makes. It is perfect for beginners as the instructions are easy to understand. Whilst sewing my third Gaïa top I had a spark of inspiration, which lead me to add ruffles at the shoulders. To my delight, it was a conclusive test!
That’s what I also like in sewing: it brings me pride. I am proud of myself. What a pleasant surprise each time you wear a garment you have made. And what a joy when you give one of your makes to someone and you make them happy.

PREPARE THE PATTERN
If you don’t have the I AM Gaïa sewing pattern, discover it now.
Download the complimentary Ruffles pattern piece for I AM Gaïa, print it and cut the desired size
Important: if you wish to finish the edge with a rolled hem using an overlocker or a sewing machine equipped with a rolled hem foot, you can cut the piece without amending it. If you would like to finish the edge using a sewing machine without a rolled hem foot, you will need to add a 3/8’’ seam allowance around the curved line before cutting the pattern piece.
CUTTING THE FABRIC
Cut the “Ruffles” piece twice in the fabric and clip the notch.
Cut the other pieces of pattern as indicated on the layout plan.
Do not cut nor prepare the ribbon pieces.
SEWING PROCESS
Sew steps 2 to 4 following the instructions booklet.
Before step 5 prepare the ruffles following these instructions.
FINISHING THE CURVED EDGE
Using an overlocker: Finish the curved edge using a rolled hem stitch. Please note you can also use a rolled hem foot on your sewing machine to finish it with a rolled hem.

Using a sewing machine without a rolled hem foot: Fold and iron the curved edge 3/16’’ on the wrong side and then again fold and iron another 3/16’’ on the wrong side. Pin in place and topstitch.
GATHERING THE RUFFLES
On the straight edge, sew a row of gathering stitches at slightly less than 3/8’’.

Place the ruffles and the garment right sides together at the armhole. Match the notch with the shoulder seam and pin in place.
Note: Refer to the pattern piece to know which part of the ruffles to pin on the front and which to pin on the back.
Pin the extremities (tips) of the ruffles piece as follows:
Size 36
Front: 3 15/16’’ (9.4 cm) from the shoulder seam
Back: 3 15/16’’ (9.4 cm) from the shoulder seam
Size 38
Front: 4’’ (10 cm) from the shoulder seam
Back: 4’’ (10 cm) from the shoulder seam
Size 40
Front: 4 9/16’’ (10.6 cm) from the shoulder seam
Back: 4 1/2’’ (11.4 cm) from the shoulder seam
Size 42
Front: 4 7/16’’ (11.2 cm) from the shoulder seam
Back: 5 1/16’’ (12.8 cm) from the shoulder seam
Size 44
Front: 4 5/8’’ (11.8 cm) from the shoulder seam
Back: 5 5/8’’ (14.2 cm) from the shoulder seam
Size 46
Front: 4 7/8’’ (12.4 cm) from the shoulder seam
Back: 6 1/8’’ (15.6 cm) from the shoulder seam

Pull the gather thread until the both ruffle piece is the same length as the armhole. Even out the gathers and pin in place.
Add the bias tape as indicated at step 5 of the instructions booklet.
Add the bias tape as indicated at step 5 of the instructions booklet.

You’ve finished your I AM Gaïa cami top. Slip in your Gaïa top, go sip a cocktail with your friends and let the compliments flow.
If you don’t have the I AM Gaïa sewing pattern yet, don’t wait and discover it now.
