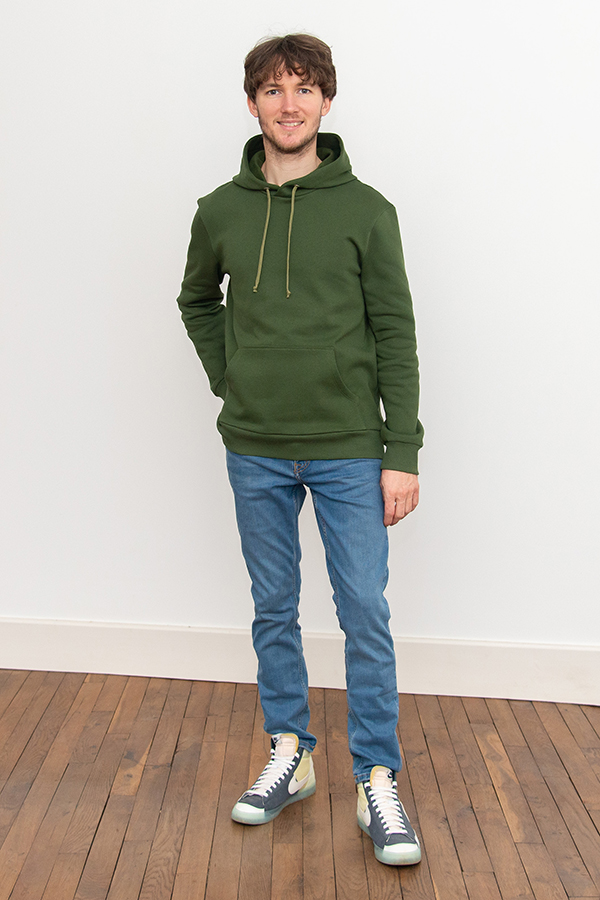
With different finishing options, necklines, styles, lengths and pocket types, the I AM Rainbow sweatshirt sewing pattern is the ultimate sweatshirt sewing pattern from I AM Patterns. And cherry on top, the pattern is available for the whole family, in PDF and paper format.

Whether you’re sewing the women, men or kids pattern, this sweatshirt is a wardrobe essential. And as such, we’d like to keep it and wear it as long as possible. So, today, let’s focus on the finishing touches.
For this article, we’ve chosen to sew version A5. It includes all the finishes that we’ll discuss here: finishing the welt pocket bags, the zip tapes and the neckline. But why stop there? You can also apply the techniques to finish all the seams and specially the seams of the hood.

Let’s start with the welt pocket bags
With I AM Rainbow, the welt pocket bags are visible on the inside of the garment. The method, shown below, will replace the overlock around the pocket bags with visible bias tape. This way, you will get a nice finish, while customising your sweatshirt.


For this, you will need a 1 9/16’’ (4 cm) wide bias tape. The length should be longer than the contour of each pocket bag. As said previously, the following steps apply instead of overlocking the edge of the pocket bag.

Fold one end of the bias tape on the wrong side.

Unfold one edge of your bias tape and pin it to the pocket bag on the side that lies against the front of the sweater. Start stitching following the crease.


As you approach each corner, drop the needle down into the fabric. Use a ruler and a chalk pencil to mark the end point of your seam 3/8’’ (1 cm) from the bottom edge.


Start sewing again and finish exactly on the mark. Backstitch.


Fold your bias tape wrong sides together, opposite your pocket bag. You will get a diagonal line that goes through the corner of the pocket bag.

Make a second fold by folding the bias along the bottom of the pocket bag. Pin in place and sew, starting backstitch. Finish sewing the pocket bag following the same instructions.


For the corners near the layers of the welt, make sure to sew through all the layers of the pocket but make sure not to sew the front of your sweater.


These corners will be thicker due to all the layers of fabric. Sometimes machines have difficulties going through layers. If it’s the case, use a leveller or scraps of fabric under the presser foot to level it and make it easier to go through all layers.

As you approach the starting point of your seam, overlap your bias tape by 3/8’’ (1 cm). Trim the excess and finish stitching, making sure the stitches overlap the first seam.


Press the bias tape towards the outside.


Place the pocket with the wrong side of the front facing you.

Fold the bias tape over the seam allowance in order to enclose the raw edge of the pocket bag between the tape. At the corners, fold your bias tape to form a nice angle. Use an iron if necessary. Do one length first, focusing on the corner, then fold the second length over.


The fold should form a diagonal on both sides of the corner.


Hold the bias tape with clips and topstitch 1/8’’ (2 mm) from the edge with a slightly longer straight stitch. Carefully tuck your thread tails.


That’s it. You’ve got a customised welt pocket that looks as good on the outside as it does on the inside.


Let’s continue with finishing the zip tapes
On the original sewing pattern, the zip tapes are visible on the inside of the garment. The following method will allow you to hide them. It is applied after the zip has been basted. You will need a 1 3/16’’ (3 cm) wide bias tape a bit longer than the zip tape.


Place the bias tape on the front right sides together and pin the bias tape to the zip tape. Sew along the front edge at 3/8’’ (1 cm).


Fold and press the bias tape over the seam allowance in order to enclose the raw edge of the centre front between the bias tape. Press the zip tape towards the wrong side of the garment. The raw edge of the bias tape is sandwiched between the wrong side of the zip tape and the wrong side of the front.


Looking at the wrong side of the garment, pin all layers in place. The topstitching will be done on the right side of the sweater so place the head of the pins towards the teeth of the zip. This way they will be easier to remove when stitching.

At the top of the zip, the bias tape will be in the continuity of the ribbon. It will then be hidden by the neckline tape (see next chapter).

At the bottom of the zip, the bias tape will be folded so that it is invisible from the front.
To do this, place the garment wrong side facing you. Unfold the bias tape at the bottom of the zip. Then, fold the bottom end of the bias tape on itself upwards.


Form an angle, as shown on the left of the picture below. Use the iron to mark the fold if needed. Then, fold the bias tape back on the wrong side of the zip tape.


Place the zip in its final position (towards the wrong side of the garment).

Hold all layers together using pins. If some areas have too many layers for pins, as shown on the picture, use clips instead of pins.
Don’t forget to place the heads of the pins towards the teeth of the zip.

Looking at the right side, and using an extended straight stitch, topstitch all layers at 5/16’’ (8 mm) along the zip.


If your fabric is too thick, especially at the bottom band of the sweater, sew the bias tape in place by hand with an invisible stitch.

Now your zip tape is neat and personalised.

Finally, let’s finish the neckline
Your I AM Rainbow sweatshirt is almost finished. There is one last finishing touch you can add. It consists of hiding the neckline seam.

You will need a 1 5/16’’ (3 cm) wide bias tape that is a little longer than the neckline. This bias strip can also be replaced by a twill tape if you want.
Place the garment right side facing you. The hood is placed downwards (against the garment) in order to expose the neckline seam. Place the bias tape at the neckline right side down and pin along the neckline, making sure to leave excess at each end. On each end, at the zip, fold the excess bias to the back so that the zip is sandwiched in between.


Sew along the neckline at 5/16’’ (7.5 mm).


Cut off the excess tape at the top of the zip and trim the corners


Press the bias tape towards the outside.

Press the bias tape so that the seam allowances of the neckline are sandwiched in between. Fold all layers towards the bottom of the neckline on the wrong side of the garment. Make sure that the width of the binding is the same along the entire neckline. If necessary, press to mark the fold. Pin in place.

Topstitch 1/4’’ (6 mm) from the neckline seam using a slightly longer straight stitch.


Your I AM Rainbow sweatshirt is finished. It is as beautiful on the outside as it is on the inside. This unique piece will become a staple in your wardrobe…


Yes, it’s as simple as this! If you don’t yet have the Rainbow pattern in your pattern library, discover it now. It is available for women, men and children.


Many thanks to à Émilie from @mggplusplus for creating this tutorial.

